Thursday, July 31, 2014

With Love

I just returned from a family vacation to Hershey Park and I couldn't wait to ink up something from my newest staff of goodies from Simon Says Stamp!  I loved the newly released Sweet Rose stamp set by Clearly Besotted and and since it is an Anything Goes Challenge this week on the Simon Says Stamp Wednesday Challenge blog, I played along!


I stamped the sentiment and image in MFT black licorice hybrid ink and then die cut it using the MFT Die-namics Vertical Stitched Strips.I wanted the image panel to neatly lap under the MFT Die-Namics  Stripes Cover-Up so I trimmed the image panel and adhered it together so that it is hidden under the red strip.  


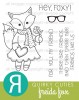
 I colored the image  with copics (R59, R29, R24, R05, G99, G94, and BG10.  I used a clear star Gelly Roll pen to add some shimmer to the image.   


I used the solid stamped and stamped the images in MFT wild cherry and gumdrop green ink on the inside and added another sentiment from the Sweet Rose stamp set.  


http://www.simonsaysstampblog.com/wednesdaychallenge/simon-says-anything-goes-6/

DS162 - Sweet Birthday Wishes

Welcome to this week's addition of the Deconstructed Sketch!
I decided to play with some of the new stamps and dies from the MFT July release to make a fun birthday card.


Yep, I am playing with Distress Inks again!  I started with a PTI white panel and I stamped the new MFT Confetti Background with VersaMark ink and then heat embossed with clear embossing powder.  I blended on some Picked Raspberry, Spiced Marmalade, and Mustard Seed distress ink.


I stamped the cupcake stand from the MFT Sweet Birthday Wishes in black licorice hybrid ink.  I die cut the image using the the coordinating Die-namics. I colored the stand and the cupcake bases with copics and added white polka dots with a white gel pen.  I used my razzle berry re-inker to tint my modeling paste and then used a paint brush to add the "frosting."  I sprinkled the frosted cupcakes with glitter.  


Finally, I heat embossed the sentiment with white embossing powder.  

Here is the sketch:


Head to the Deconstructed Sketch blog to play along and link up your creations.  Be sure to check the creations of my fellow DT members for some inspiration!


Monday, July 28, 2014

SPDSS08 -You're My Hero

If you love sketch challenges, like I do, here's one for you!
It's the SugarPea Designs SugarSketch #008!

I am playing along with the SugarPea Designs My Hero stamp set.

Wish I could tell you from which 6x6 paper pad I got that patterned paper, but I have no idea what I did with it!   Sorry about that!  


I stamped my image onto PTI white CS in MFT black licorice hybrid ink and colored him up with copics.   I used a white gel pen to add the stripes to his tie and to add the freckles to his cheeks.   I fussy cut him out and popped him up with foam dots.  

Here is the sketch:


The rules are very simple…
  Create a new card or project using the SugarSketch provided.
  • SugarPea Design stamps are NOT required to play along or to win but would be appreciated 
  • You may rotate/flip the sketch & replace shapes – so long as the original sketch layout is recognizable 
  • Upload to your blog or other Online Gallery using Keyword: SPDSS008 so that we may check out your beautiful work
  • Add your name and link to your project in the InLinkz on the SugarPea Designs Blog.
  • One randomly selected winner will receive a $10 Gift Certificate to the SugarPea Designs Online Shoppe.  However, if the winning entry features a SugarPea Designs stamp we will increase the prize to $15


I fyou would like to make "My Hero" your own, you can find it HERE in the SugarPea Designs online shoppe! 

Store-My-Hero


Saturday, July 26, 2014

Great Summer Deal - Act Fast!

If you follow my blog, you know I tend to do a lot of layering and matting in my designs and my not so secret weapon for creating perfect layers is THIS combo of tools which you can at a great price of only $22 now through July 31st!

Perfect Paper Crafting

The Perfect Cutting Mat and the Perfect Layers Mini are MUST HAVE tools if you like to mat your images like I do!   You can get both now as a combo and save over 25%!  I also highly recommend the Perfect Ruler, too, which has several cool features but I love it most because it has a centering ruler for perfect centering of all your images and sentiments in your designs!  No more "eye balling" things and hoping for the best!   Now your cards will be perfect in every way!  

You can check out all of the cool paper crafting tools on the Perfect Paper Crafting online shoppe! 

Thursday, July 24, 2014

DS161 - Thanks!

Happy Thursday to ya!   Thursday means there is a new Deconstructed Sketch ready for you to tackle and get your mojo flowin'!  

Word dies are all the rage right now so I decided to play along with just that.
This card features the Simon Says Stamp Thanks craft die.  


I chose some pretty patterned paper from te Carta Bella Sew Lovely 6x6 paper pad.  
I used a dies from the MFT Die-namics Stitched Circle STAX  to create the circular panel and a die from the MFT Die-namics Blueprints 12 for the sentiment panel.  I added a few rhinestones to embellish.  


I die cut the sentiment with the Simon Says Stamp Thanks craft die from some more of that same patterned paper to add a little interest.  

Here's the sketch:


Head to the Deconstructed Sketch blog to play along and link up your creations.  Be sure to check the creations of my fellow DT members for some inspiration!


Reverse Confetti Quirky Cuties Blog Hop

I was thrilled to have received an email from the Jen del Muro, talented designer and owner of Reverse Confetti, inviting me to part of a blog hop featuring the Reverse Confetti Quirky Cuties line of stamps!  Since coloring is my forte. I was more than happy to join in! 

I adore this images so I ended up making two cards! 
First up is Oliver Owl


I had a blast coloring up this little guy!  I started with a circular panel that I die cut using the MFT Die-namics stitched circle STAX.  Then I blended in some Tim Holtz rusty hinge, wild honey, spiced marmalade, and mustard seed Distress Inks and spritzed with water. 


I colored my image with copics and used a white gel pen to add some texture to his his feathers.


I used the MFT pinstrip background stamp and stamped it as well as the sentiment in hot fudge ink.  I added a tangy orange button and twine to embellish. 


I repeated the lay out on the inside, stamped another sentiment, and stamped Oliver Owl one more time.  This time I only added a little pop of color to the image.  

And here is my second card featuring Freida Fox!


This time I paired some PP from the Echo Park Paradise Beach 6x6 paper pad with some MFT hot fudge CS and some PTI white CS.   


Once again I colored my image with copics.  I again used a white gel pen to add the polka dots and a few little freckles to her rosy cheeks.  


I stamped the sentiment in hot fudge ink and added a hot fudge button and hemp cord to embellish.   

Whether you are a coloring proof just starting out, these Quirky Cuties are fun to color and they are paired with adorable sentiments!  They stamp like a dream, too!  These are high quality clear polymer stamps! 

Reverse Confetti is pairing up with Studio 3 Solutions for a cross promotional blog hop which means we have TWO prize packages up for grabs for two random commenters!  Two lucky ducks will each win a Studio 3 Solutions Color Cubbie AND a choice of 3 Reverse Confetti Quirky Cuties stamp sets!  Yep!  Winners choice! 

Ready to hop?!

If you got here from Jessica Fick's blog, then your next stop is Lisa Henke's blog
If you started here first, then you want to go back to the beginning so head right to the Reverse Confetti blogComments will stay open through and a winner will be announced on the Reverse Confetti blog