Thursday, May 29, 2014

DS153 - A Little Birthday Wish

Welcome to this week's addition of the Deconstructed Sketch #153!
Did you take the Watercolor for Card Makers online class?  I did!  I am a Copics girl.  Watercoloring was not something I did.......ever.  BIT the class has me looking at my crafty supplies a whole lot differently now!  


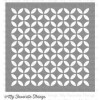
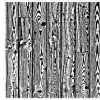
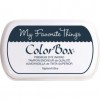
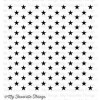
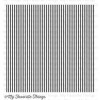
Itook my MFT Petal Circles stencil and stamped the back of it with my MFT blu raspberry and grape jelly premium dye ink pads and then spritz it with water.  I placed it onto some watercolor paper and then used a paper towel to sop up any extra water.  I heat set with my heat gun.  Cool, right?!


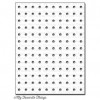
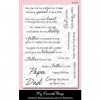
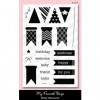
I die cut the sentiment panel with the MFT Die-namics Rectangle STAX and stamped the sentiment from the MFT Birthday Greetings stamp set in black licorice ink.   I added a bow made from MFT blue raspberry grosgrain ribbon.   I layered the sentiment panel over a grape jelly panel that I die cut using the MFT Die-namics Square STAX.   
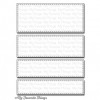
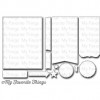
Here's the sketch:


 Head to the Deconstructed Sketch blog to play along and link up your creations.  Be sure to check the creations of my fellow DT members for some inspiration!

Tuesday, May 27, 2014

MFT Creative Challenge - Make it Masculine

Each month the MFT Designers are given a challenge to get our creative juices flowing and with Father's Day just around the corner, our challenge this month was to "Make It Masculine."

For my first project, I made a manly thank you card that would be perfect for that
Mr. Fix It in your life.  Home Depot colors were my inspiration.


I started by die cutting the panels from natural CS with the Die-namics Horizontal Stitched Strips.  I stamped them in kraft ink with the Wood Plank background stamp and then adhered them onto a hot fudge CS panel   


I adhered a piece of tin foil to a piece of CS and then ran it through the Big Shot with the Die-namics Pegboard Cover-Up.  I die cut the tools from white CS using the Die-namics Tool Time and then colored the pieces with copics.   I again used the Die-namics Horizontal Stitched Strips to cut the sentiment panel from orange fizz CS and stamped the sentiment from the Let's Tool Around stamp set in hot fudge ink.


I again used the Die-namics Horizontal Stitched Strips (LOVE THOSE THINGS), the Wood Plank Background stamp and a sentiment from the Let's Tool Around stamp set to complete the inside of my card.   

For my second project, I was trying to think outside the box.............and ending up making a box.  
A Cigar Box!  My husband loves a good cigar once in a while and I thought this would be a nice way to present one to him as a Father's Day gift. 


I figured out how to make this as I went, but now that I know how to do it, I will make another and will post a tutorial later this week!   Stay tuned for that!


I stamped my nightshift blue CS with the Star Background in nightshift blue ink.   I stamped the smooth white panel with the Pinstripe Background in red hot ink.   I used the Die-namics Blueprints 13 to create the sentiment panel from smooth white and red hot CS.  I stamped the sentiment from the Clearly Sentiment about Father's stamp set in red hot and nightshift blue ink. 


Hope you've been inspired!  Be sure to head over to the MFT blog for a list of designers who are participating in today's creative challenge!


Monday, May 26, 2014

MFT Blog Candy WINNER!

And we have a winner! 
To all my new blog followers......WELCOME!
To my faithful blog followers......THANK YOU!

So happy to share my love of MFT with my blog followers by offering up monthly MFT blog candy!


And winner of the Birdie Brown Let's Hang Out stamp set, Die-namics Let's Hang Out,

Lyn Wallan-Smith

Congratulations!  Please email your address to me at kimoc21@gmail.com so I can get your blog candy in the mail and en route to you!   


SPDSS04 - Ready, Set, Blow!

Who doesn't love a good sketch challenge?!
Have you discovered the SugarSketch Challenge?
I am playing along with the SugarPea Designs "Blow Me Away" stamp set.


I started with a piece of Black CS that I ran throught the Big Shot with the MFT Die-namics Pegboard Cover-Up.    I die cut the orange fizz panel with the MFT Die-namics Horizontal Stitched Strips and then stamped it with the MFT Pinstripe Background stampin orange fizz ink.   I used the MFT Bitty Banners stamp set and coordinating Die-namics to create the banner,   


I stamped my image in MFT black licorice hybrid ink and colored the dragon with copics.  I also used a white gel pen to add some additional dots to his skin.   I added some orange peel Stickles to the flame of the candle.


Dragon - YG67, YG63, YG61, YR15, YR12, Y23, and Y21
cake - C2, C1, E57, E55, B02, B00, B26

Here is the sketch:


Ready to play along?  The rules are simple:


  • Create a new card or project using the SugarSketch provided.
  • SugarPea Design stamps are NOT required to play along or to win but would be appreciated :)
  • You may rotate/flip the sketch & replace shapes – so long as the original sketch layout is recognizable 
  • Upload to your blog or other Online Gallery using Keyword: SPDSS04 so that we may check out your beautiful work
  • Add your name and link to your project in the InLinkz on the SugarPea Designs Blog

If you would like to purchase the Blow Me Away stamp set, you can find it RIGHT HERE