I don't know about you, but I find myself buying gift cards for Christmas presents more and more.
I decided to make pocket gift card holders for this years gifts. They make the presentation of the gift card just a little more special!
I decided to make pocket gift card holders for this years gifts. They make the presentation of the gift card just a little more special!
Here's how to make them:
Start with a 4.25" x 11" piece of card stock and score at 1.25" and 5.5".
Fold the card stock in half at the 5.5" score line and then fold the flap back.
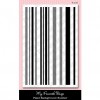
Decorate a piece of 4.25" x 4.25" piece of CS as desired and adhere it to the front of the pocket before adhering the flap down. I stamped some sweet tooth and red hot ink onto kraft CS with the MFT plaid background builder stamp set.
Add some red line tape to the inside edge of the pocket as shown to close the pocket.
I used the MFT Die-Namics pierced traditional tags STAX and the traditional Tag STAX to create my tag. I decorated the tag with the plaid background builder stamp set and the MFT Snowflake Splendor stamp set. I added some red hot ribbon, a sweet tooth button, and some hemp cord. I just used a couple of glue dots to adhere the gift card to the tag
Decorate the flap of the pocket. I heat embossed a sentiment from the MFT Snowflake Splendor stamp set. I added a snowflake that I die cut with the MFT Snowflake Splendor Die-Namics. I stamped the coordinating snowflake image in a glue pad and then sprinkled glitter over the image. I added a red hot button and some hemp cord.
I hope you enjoyed this tutorial!


.jpeg)


This is fabulous! I may have to try my hand at making a few for Christmas.
ReplyDeleteKristie
http://mypaperlife.com
A very cute gift card holder Kim - thanks for the tutorial. I'll have to give these a try :)
ReplyDeleteThis is so cute! Awesome job building that plaid back ground paper!
ReplyDeleteI love this little holder and can't wait to make my own...I like to give cash so that they can use it where ever and this will be a great way to do that by folding the bills in half and giving them rather than just in a card that no one ever reads!
ReplyDeleteA great idea and beautifully done. Love your stamped plaid background and all the great details. TFS
ReplyDelete